Monday, March 30, 2009

Marble Cake Supreme with Lemon Cream Icing


I was out thrifting with Sweetie-Pi and I spied a charming little pamphlet called "10 Cakes Husbands Like Best from Spry's Recipe Round-Up!" How could I resist that? I couldn't! There's no copyright or publishing information in the booklet, but the pictures are all in black and white and "Aunt Jenny," looks like Donna Reed or the original Betty Crocker, so I suspect it was published 40's to the 50's sometime.

I haven't had a marble cake since I don't know when, and it's been even longer than that since I've baked one. I don't know why; it's one of my favorite cakes, but typically we just go for the single flavor cake. With this booklet in hand as inspiration, I decided to make Marble Cake Supreme first.


I'm going to give you the directions as they were written, and then I'll follow with my thoughts.

Read through the directions first, as the ingredients are added and mixed at different times, with the eggs being added in two separate additions.

Oven temperature 375F. Baking time 60-70 minutes.

Marble Cake Supreme
Sift
2 3/4 cups sifted cake flour
1 3/4 cups sugar
2 teaspoons double acting baking powder
1 1/2 teaspoon salt
into a mixing bowl

Add
1 cup Spry (shortening, sic)
3/4 cup milk
2 teaspoons vanilla
1 unbeaten egg

Beat
200 strokes (2 minutes by hand or on a mixer at low speed). Scrape bowl and spoon or beater

Add
2 unbeaten eggs, 1 unbeaten egg yolk
Beat 200 strokes (same as above)

Put 1/3 of batter in a smaller mixing bowl.

Add
3/4 teaspoon cinnamon
1/16 teaspoon cloves
3/8 teaspoon allspice
3/4 tablespoon cocoa
to 1/3 of the batter (they mean this portion, not another 1/3)

Spoon
both batters alternately by tablespoons into Spry-coated 8 1/2 inch tube pan.

Run
spatula through batter several times to marble

Bake until cake tests done. Cool and remove from pans. Spread with Lemon Cream Icing.

Lemon Cream Icing
In mixing bowl, blend 2 tablespoons Homogenized Spry (shortening), 1 tablespoon butter or margarine, 1/8 teaspoon salt, 1/4 teaspoon grated lemon rind, and 1 tablespoon lemon juice. Beat in 1/2 c sifted confectioners' sugar. Add 5 tablespoons scalded light cream and 2 1/2 cups sifted confectioners' sugar, alternately, beating well after each addition. Tint delicately with a few drops of yellow food coloring,if desired. Yield: frosting for top and sides of 8 1/2" tube cake.

My thoughts: This cake was dry and crumbly. I think it's because the recipe says to cook at 375F and most of our recipes today say 350F. Secondly, the cooking time is way off. Recipe says 60-70 minutes. My cake was overdone at 45 minutes (which could account for some of the dryness, I suspect).

The spices in the chocolate were unusual; not entirely disagreeable, just a surprise. Also, I didn't try to figure out 3/4 of a tablespoon. My math skills are abysmal; I used a level tablespoon. No, I do not think that little extra bit of cocoa is what made the cake dry.

The lemon frosting is very good; it had a bright lemon flavor, and I really liked it. I'm not entirely convinced it should go on a marble cake.

Sweetie-Pi and I both had a small portion of this today, and rated it a "Hmmmmmm." I'm going ahead and making the nine remaining cakes in the "10 Cakes Husbands Like Best" booklet. I'm definitely reducing the heat next time (all the recipes call for 375F) and will adjust the cooking times based on what we know today.

And, if the other cakes turn out well, I may round back and try this one again. I think it has potential.

It does make me wonder whose husband liked this cake best, though.
Friday, March 27, 2009

Beautiful Burger Buns


For our little family gathering, I made pulled pork and naturally the needed sandwich rolls. These Beautiful Burger Buns have received a lot of acclaim with the nice folks who frequent the King Arthur Flour site.

They certainly are beautiful; just look at those golden globes! Plus they're easy enough for a beginner bread maker to tackle and have great success. The first time I made these, I followed the directions and made eight huge rolls. Since then, I make ten, which is a much better size for us.

Alas, they just aren't my favorite for either burgers or pulled pork. I think they are a little too fluffy and tender as the rolls just didn't hold up that well. They would, however, be perfect for chicken salad, tuna salad, sliced roast beef or turkey, etc. If I were going to make a tray of chicken salad sandwiches, for example, though, I think I'd make the rolls even smaller.

These rolls are easy, delicious, beautiful. I'll make them again.

Wednesday, March 25, 2009

Lemon Sugar Cookies


Want a thin sugar cookie with a big lemon flavor? Then this is your cookie. Since discovering these, I cannot stop eating them. Mercy, the lemon just explodes in my mouth and I keep going back for more.

It was my extreme good fortune to discover these delectable cookies on Gulf Coast Gram's blog. My good fortune was further expanded when I asked Anj if I could blog her recipe, and she graciously said yes! Now isn't that just like a good cook to also have a good and generous heart?

I pretty much followed the directions Anj had provided, with a couple of minor changes. Her directions didn't say whether or not to grease the cookie sheet, but I generally use parchment paper so it wasn't an issue. If I didn't, I'd be inclined to lightly grease the sheet. You won't want to leave one crumb of these cookies behind.

Secondly, even though I have a food processor, I couldn't justify hauling it out to use it for the lemon flavored sugar; the amount is just too small. So, I macerated the lemon rind into the sugar (I used the back of a spoon and really squished the grated peel into the sugar, further breaking down the grated peel to release its lemony goodness). I set the sugar mixture aside while the dough was in the fridge, giving it time to absorb flavor and fragrance.

Lastly, because there's going to be a lot of lemon sugar left over (I haven't used up all the dough yet but I can tell I have more than enough), I think I'm going to roll the little dough balls in the sugar and then cross hatch the dough on the cookie sheet. More lemony sugar! YUM!

Anj, this is definitely a new family favorite. Thank you so much for sharing!

Tuesday, March 24, 2009

Alice's Whoopie Pies


Whoopie pies are a well known treat here in New England. They're popular for potlucks and school lunches; I see them at bake sales. They never fail to please or to elicit a gasp of delight, "Whoopie pies!" Young and old light up when they see these marshmallow filled chocolate "cake sandwiches" and for good reason, they're darned good!

I have a dear friend, Alice, who is a great cook. She always cooking up something special for her family and grandchildren. These whoopie pies are among them. I asked her for the recipe, and Alice graciously shared. This is what she wrote.

Whoopie Pies

2 cups flour
1/2 cup shortening
1 cup sugar
5 tablespoons cocoa
2 eggs
1 teaspoon baking powder
1/2 teaspoon salt
1 teaspoon soda
1 teaspoon vanilla
1 cup milk

Filling

3/4 cup marshmallow fluff
3/4 cup shortening
1 cup confectioners' sugar
1 tablespoon vanilla

You know the rest. 350 degrees. Enjoy.

LOL. I did "know the rest" but just in case you don't, allow me to elaborate for you.

Generously grease two cookie sheets (or do as I do and use parchment paper). Set aside. Preheat your oven to 350F.

Combine all the whoopie pie ingredients in a medium sized bowl. Stir or mix until well combined. The batter will be kind of thick -- thicker than a boxed cake mix, for example, because you want to be able to scoop it out without running all over your cookie sheets.

Now with a tablespoon, scoop out the batter and drop it onto the cookie sheet and spread in about 2-inch circles. (Make the circles as evenly shaped as possible as you're going to sandwich them together afterwards.) The batter spreads so I only put 8 to 10 on a sheet. I have squeezed on 12, but they can tend to run together. So my saged advice is, until you get the feel for the batter and how it works, I'd go with 8 cookies per sheet, 2 x 4, leaving plenty of space in between. Make an even number, as you'll be using two for each whoopie pie. (Though the odd one is often enjoyed by the cook!)

Bake for approximately 8 to 10 minutes. When you check for doneness, look to see if it's lost its shine and you when gently touch the center does it springs back. Cool. I leave them on the pan to cool because the cookies can be a little delicate (they are tender, thin cakes after all). Or you could move them, parchment and all to a cooling rack.

Once the cookies are all made, prepare the filling. Place all the ingredients into a medium sized bowl and mix, blending well. Now if you're like Alice and me, you'll double the filling!

Once the cookies are cooled, use a thin, wide spatula to remove them from the pan. I set them in two rows, two by two, the bottoms of the cakes facing up towards me. Spread a nice dollop of filling on one half of the whoopies. And when the filling is all used up, go back and put on the covers, bottom side facing the filling.

Wrap individually in waxed paper or plastic wrap. They'll keep a couple of days, I think, but I can't swear to it. We've never had them around long enough to find out for sure.

Stand back and watch faces light up.

Wednesday, March 18, 2009

Apricot Bars


This has to be among the most elegant cookies that I make. Apricot goodness just fills your mouth with sunshine! Beautiful and delicious! These would be perfect for a shower or tea with the girls.

Since returning to my cookbooks for inspiration, I am rediscovering so many gems. I had completely forgotten all about this one until I saw it again in my Heartland Baking cookbook. I'm glad I found it and I just can't wait to share it with you!


Apricot Bars

For the crust
1/2 cup firmly packed brown sugar
3/4 cup sifted flour
6 tablespoons cold, unsalted butter, diced

For the topping
1 cup dried apricots
1 cup water
grated rind of 1 lemon
1/3 cup sugar
2 teaspoons cornstarch
1/2 cup chopped walnuts

You're going to be doing a little multi-tasking here, so read through the directions first.

Grate the lemon, set aside. Finely chop the walnuts, set aside. (Make them wait for you until you need them.)

Preheat your oven to 350F. You'll need an 8 x 8 baking dish, ungreased.

In a medium bowl, mix the brown sugar and flour. Add the butter and using a pastry blender, cut the butter in the mixture until the mixture resembles coarse crumbs.

Turn the mixture into the baking dish and press it, forming an even layer. Bake the crust for 15 minutes and then remove it from the oven. Leave the oven on.

While the crust is baking, combine the apricots and water in a saucepan. Bring to a simmer and cook until the apricots are soft, about 10 minutes.

Strain the liquid, reserve. Chop the apricots.

Return the apricots to the saucepan and add the lemon rind, sugar, cornstarch and 4 tablespoons of the cooking liquid. Cook about one minute. Keep a watchful eye on the time! Too long and you'll have the apricots cemented to your saucepan.

Cool slightly. Spread the apricot mixture over the crust.

Sprinkle the chopped walnuts and put the baking dish in the oven. Bake for 20 minutes more.

Cool before cutting into bars.

Sunday, March 15, 2009

Best Yet Strawberry Pie


I received a lovely email from a representative of Pom Wonderful, the nice folks who provide us with their delicious and healthful pomegranate products. I've purchased and enjoyed their products in the past, so when I was asked if I would like a sample, I didn't hesitate. I already knew how much I liked them!


I was completely taken aback by their generous gift and knew then and there I would have to make something special. So I decided to adventurous! After some thought and some research, I decided to redo my favorite strawberry pie. I like the pie but strawberries are out of season, and it just doesn't have a clearly defined fruit flavor. I studied the recipe for a while and I knew what it needed. Haven't I stated before that water doesn't add flavor to anything? The answer was so clear (and ruby red and delicious!).

I swapped out the water for an equal amount of pomegranate, added maybe a teaspoon of grated lemon peel, omitted the food coloring and followed the rest of the recipe as written.

Have mercy, this turned out to be the best yet strawberry pie. The pomegranate complimented and enhanced the strawberries, giving the pie a more complex fruity flavor, but not overpowering the strawberries. The filling is rich, ruby red,luscious.It makes a gorgeous, glistening pie, and more importantly, oh so good!

And don't you just know I'm thinking about upscaling my blueberry pie.

Thursday, March 12, 2009

White Bread and Cinnamon Raisin Bread

r

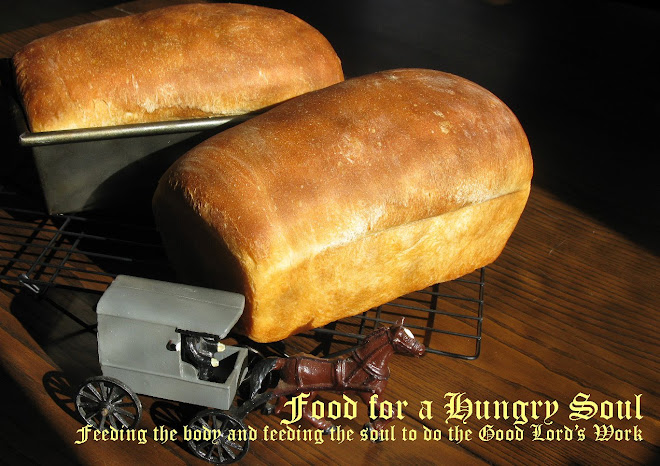
I have to laugh at myself. We were low on bread, I had the time and the inclination so I turned to my old friend, Betty Crocker, and found this time honored recipe. So what's so funny about that? Because the serving size says 2 loaves in two 9 x 5 pans or 3 loaves in three 8 x 4 pans. I thought three loaves of bread would be too much so I made two! It's the same amount of dough!

Sweetie-Pi won't eat raisin bread, so I was delighted to find a recipe that gave me the option to make a loaf of both.


As you can see, this recipe made big, beautiful loaves, sweet, but not like my Amish White Bread. I would still like to try a bread with even less sweetness. These loaves are hearty and delicious. The slices are so wide that they extended out past the toaster slots. Now that's big! When I spread the raisins (actually I used currants) on, I thought I had poured on a ton, but when I see the bread slices, it doesn't look nearly enough. So next time, more currants! I did not use the full amount of the additional sugar/cinnamon mixture, maybe several teaspoons less, and it was sweet, cinnamony enough for me.

White Bread (with Variation)

2 packages active dry yeast
3/4 cup warm water (105 to 115F)
2 2/3 cups warm water
1/4 cup sugar
1 tablespoon salt
3 tablespoons shortening
9 to 10 cups flour
soft butter (for spreading on rising loaves)

In a large mixing bowl (not stainless steel) dissolve and proof the yeast in the 3/4 cup of warm water. Once it's all nice and foamy (maybe in about 10 minutes), stir in the 2 2/3 cups warm water, sugar, salt, shortening and 5 cups of the flour. Beat until smooth. Then add enough remaining flour to make the dough easy to handle. (I usually gauge it by the fact that it doesn't stick to my hands but is still very soft. You'll get the feel of it, don't worry.)

Lightly spread a little flour on a flat surface and turn the dough out onto it. Knead until smooth and elastic, adding small amounts of flour as needed to keep it from sticking to your work surface (about ten minutes). Place dough in a greased bowl, turning the dough so that the greased side is up (this will create less resistance so that the dough can rise easier). Cover and let rise in a warm place until double, about one hour.

After it is risen, punch the dough down and divide in half. Roll each half into a rectangle, 18 x 9 inches. Roll up, beginning at short side. With the sides of your hand, press each end to seal. Fold ends under loaf. Place seam side down in greased loaf pans. Let rise again until double, about one hour.

Heat oven to 425F. Place the loaves on a low rack so that the tops of the pans are in the center of the oven. Bake 30 to 35 minutes or until deep golden brown and loaves sound hollow when tapped. Remove from pans. Brush loaves with soft butter. Cool on rack.

Cinnamon-Raisin Bread

Stir 1 cup of raisins with a little flour. After rolling dough into rectangles, sprinkle each with one tablespoon water and mixture of 1/4 cup sugar and 2 teaspoons cinnamon. (I combined the sugar and cinnamon together in a custard cup, whisked to blend well and spread with a teaspoon.) Now as I said, I thought I had poured on plenty of currants, but when I sliced it, they didn't look abundant enough. I would add more; I would also make sure that I added them all the way to the edges. If some fall out as I roll up the bread, well my treat!

The raisin bread made some mighty fine toast and smelled so good as it was toasting. The white bread is a great versatile bread, good for sandwiches, french toast, plain with butter!

Monday, March 9, 2009

Flemish Carrot Soup


Spring has flirted with us for a day or two, seducing us with promises of more as we stood outside on the back deck, basking in the first warm rays. And just as suddenly, the wind picked up, the skies were heavy with snow, and my thoughts turned to something warm and satisfying.

We're pretty simple folk here; not a whole lot of gourmet cooking in my kitchen. There are certain foodstuffs that I keep; for vegetables, typically carrots, potatoes, onions, scallions, celery. I brought out several cookbooks, and settled into my Everybody Eats Well in Belgium cookbook by Ruth Van Waerebeek with Maria Robbins. And there I saw it. I was hesitant to try it, as the soups we eat tend to be chunky with vegetables with maybe some pasta thrown in for good measure and this soup was pureed, of all things. Would Sweetie-Pi even try this? he can be so particular.

I shouldn't have worried; after the first mouthful Sweetie-Pi matched me spoonful for spoonful. This soup is sophisticated. It is sublime, velvety, earthy, rich. It's orange, classy in a beautiful bowl. It should be served to only your most discerning friends and family.

Flemish Carrot Soup

3 tablespoons unsalted butter
3 medium leeks, white and light green parts only, rinsed well and sliced into thin rings **
1 large onion, sliced
2 cups chicken broth
4 cups water**
1 1/2 pounds carrots, peeled and cut into 1-inch slices
1 large baking potato, peeled and cubed
1 tablespoon fresh thyme or 1 1/2 teaspoons dried thyme
1 bay leaf
1 cup milk, plus additional if needed
salt and ground pepper to taste
2 tablespoons minced fresh parsley
croutons

Melt the butter in a heavy soup pot over medium heat. Add the leeks and onions, cook, stirring until wilted, but not browned, about ten minutes

Add the chicken broth, water, carrots, potato, thyme and bay leaf. Cover, simmer until the vegetables are very soft, about 35 minutes. Remove from heat and let cool a little. Discard the bay leaf.

Puree the soup in small batches in a blender or food processor (or use a food emersion blender). Return the soup to the pot and stir in the milk, adding a little more if the soup is too thick for your liking. Season with salt and pepper to taste.

Reheat gently and serve sprinkled with minced parsley. Serve the croutons in a bowl at the table.

** The recipe called for leeks, but in the variations section, it was suggested to use a bunch of scallions for the leeks. Scallions I had.

** Also the recipe calls for four cups of water. It is my strong personal opinion that water does not flavor anything. So I increased the chicken broth (I only had canned) to 4 cups and reduced the water to 2 cups.

As an aside, we love Agatha Christie's Belgium detective, Hercule Poirot. You just know that we had to talk in his clipped accent all the while we savored this soup. **sigh** So much for classy and sophisticated.

Saturday, March 7, 2009

Oatmeal Scotchies


Ever notice how certain aromas or flavors can whisk you back to a favorite time and memory? The smell of cookies baking is one that puts me back in my grandmother's tiny two room house. Her table and daybed that doubled as a couch took up almost the entire space in her kitchen/seating area. She was like that, always thinking of the comfort of others.

Gram didn't make these cookies, but if she knew about them, she would have. Even hours after baking, the sweet fragrance of butterscotch lingers in the air. And coming in from outdoors, the fragrance says, "Welcome home!" This recipe is in my Best Recipes From the Backs of Boxes, Bottles, Cans and Jars by Ceil Dyer. There is recipe on the back of the Nestles Butterscotch Morsels bag, which I presume is an updated version of this. It's this version I love, however.It's been around since the 1950's, and there's good reason why this version is still well loved. It's sweet, rich, butterscotchy good!


Oatmeal Scotchies

2 cups unsifted flour
2 teaspoons baking powder
1 teaspoon baking soda
1 teaspoon salt

1 cup butter, softened (two sticks)
1 1/2 cups firmly packed brown sugar
2 eggs
1 tablespoon water

1 1/2 cups quick oats, uncooked
one 12-ounce package (2 cups) butterscotch morsels **
1/2 teaspoon orange extract

Preheat oven to 375 Fahrenheit. Grease cookie sheet, set aside.

In a small bowl, combine flour, baking powder, baking soda and salt.

In a separate large bowl, combine butter, brown sugar, eggs and water. Beat until creamy (about five minutes). Gradually add the flour. (The mixture will be heavy and stiff.) With a wooden spoon or mixing spatula stir in oats and butterscotch morsels and the orange extract.

Drop slightly rounded tablespoonfuls (about the size of a walnut) onto the cookie sheet. Bake for 10 to 12 minutes.

Recipe says it makes 4 dozen. I had three dozen plus 4. Guess my tablespoon is a little larger than theirs!

**Recipe calls for a 12 ounce bag, but the bag I had was only 11 ounces. It worked out just fine; we did not miss the other ounce.

Friday, March 6, 2009

Oven Fried Chicken With Honey Butter Sauce


I'm really more of a baker. I think I'm made of flour, sugar and butter (which is why, I try to convince Sweetie-Pi, I melt in the rain. So far he hasn't bought it.)

I only occasionally eat red meat (with the exception of hamburg -- what I'm referring to is slab 'o beef) or fish. I could easily go my whole life without either one. I do, however, like chicken.

Ever meet someone who's like an angel on this earth? That would be someone like my friend, Kathye. Now there's a woman who is always on the go, involved in her community, volunteer activities, and friends and family. And to top it all off, she's a great cook with a generous heart and table. She shared this recipe that she discovered in Martha Dixon's Copper Kettle cook book.

Remember how I mentioned I don't particularly care for red meat? Well, Sweetie-Pi doesn't care all that much for chicken. But let me tell you, when I serve this, the yummy noises he makes are nonstop, and he keeps saying over and over again, "This is good! This is really, really good!"

Oven Fried Chicken with Honey Butter Sauce

1 tender frying chicken, cut up for frying
1 cup flour
2 teaspoons salt
1/4 teaspoon pepper
2 teaspoons paprika
1/2 cup butter (1 stick)

1/4 cup melted butter (1/2 stick)
1/4 cup honey
1/4 cup lemon juice

Dip chicken pieces into mixture of flour, salt, pepper, and paprika. Melt one stick butter in a shallow baking pan in a hot oven (400 degrees). Remove pan from oven. Arrange chicken in single layer in pan, turning to coat with butter. Bake skin-side down in a hot oven (400F) 30 minutes. Turn chicken.

Prepare the butter~honey sauce made by melting 1/4 cup butter in a saucepan and adding honey and lemon juice. Spoon sauce over chicken. Bake another 30 minutes or until fork-tender Spoon sauce over chicken during last 15 minutes of baking,
Yield: 4 servings.

There's only Sweetie-Pi and I, so a whole chicken would be way too much for us. I bought a package of three boneless, skiness chicken breasts, and divided the breasts. I reduced the ingredients by half, except for the sauce.

Because I'm a lazy cook, I combine all the coating ingredients into a large plastic bag and add the chicken and shake to distribute. (I don't like the feeling of raw chicken, what can I say?)

As the breasts are thinner than whole chicken parts, the cooking time is greatly reduced. I cooked the breasts for 20 minutes on one side, added the sauce, and cooked an additional 10-15 minutes or so.

One medium lemon should give you about 1/4 cup of lemon juice. When I made the sauce, I also tossed in a little lemon rind with the butter as it melted. I happen to love lemon and have a sour taste bud as well as a sweet one. The nice thing about the sauce, if you sample it, your taste buds will tell you if you want more lemon or more honey.

Tender, juicy. Honey sweet. Lemon tart. Beautiful to look at. As Sweetie-pi said, "This is good! This is really, really good!"

Thursday, March 5, 2009

Peanut Butter Fudge


I've held onto this recipe since I was a Junior in High School and I have found none better. I've shared this recipe many times, and now I'm happy to share it with you as well.

Life is ironic. I wasn't the least bit interested in HomeEc, (home economics) I was so all-fired sure that I'd never be married and have to deal with the mundane, like balancing a checkbook, knowing how to set a proper table, or how to write a thank-you note. I was going to think great thoughts, write even greater books, travel the globe and have fantastic adventures.

Then I grew up.

I still love learning, I'm writing a blog, and I travel to work and the grocery store, and occasionally visit out-of-state family and friends, so some of my dreams have come true, LOL.

It was Mrs. Haus who imparted practical knowledge, skills, and manners that have lasted me through my entire life. What she taught me has opened doors that I never even dreamed existed.

Thank you, Mrs. Haus! I'm keeping my eyes on the stars and my feet on the ground.

Most of the time.


Peanut Butter Fudge

1 cup peanut butter ] Premeasure and set aside
1 cup marshmallow fluff ] Premeasure and set aside

2/3 cup milk
2 cup sugar
1 teaspoon vanilla

Generously butter an 8 x 8 baking dish.

Combine the milk and sugar in a medium saucepan. Over medium heat, boil until it reaches the soft ball stage about 135 degrees Fahrenheit on a candy thermometer, or when a drop is poured into a glass of cold water, it holds its shape without smushing at the bottom.

Add the peanut butter and fluff. Stir quickly, beating well. Add vanilla mix until well combined.

Immediately pour into the baking pan. This fudge starts to set up FAST once the peanut butter and marshmallow fluff are added. If you beat this too long or dilly dally dreaming about boys (thanks for the pointer, Mrs. Haus), the fudge can become grainy and will not pour well into the dish.

Cut when cool. It's best when it has "ripened" a bit, meaning letting it sit for several hours, before enjoying.

Monday, March 2, 2009

Bonnie Butter Cake


I wanted to make it a point not to blog a recipe that somebody else had already done. I mean, really, don't we read blogs to find something different? I have a hundred or so cookbooks so I should be able to find something fresh and interesting, to say nothing of the family recipes I've collected and wanted to share. But as karma would have it, I saw this recipe on The Wooden Spoon that Old Roses had posted and I simply could not resist. I checked my raggedy Betty Crocker cookbook, and yes, I've had that recipe all along. I had been neglecting my old, tried and true friend, when there were still some great undiscovered treasures between her red covers.

So, true to my life experience, I am going to take back that manifesto, and tell you about the single best yellow cake I have ever put in my mouth. Really, I kid you not. I adore yellow cakes; chocolate is good, I make it for others, but I will hip chuck you if you are standing between me and this cake.


Bonnie Butter Cake

2/3 cup butter (do not even tell me you are using margarine here!)
1 - 3/4 cups sugar
2 eggs (1/3 to 1/2 cup)
1 - 1/2 teaspoons vanilla
3 cups cake flour (or 2 3/4 cups all purpose flour )
2- 1/2 teaspoons baking powder
1 teaspoon salt
1- 1/4 cups milk

French Silk Frosting (recipe to follow below)

Preheat oven to 350F. Set racks so that the top of the cake will be at the halfway point in your oven. Grease and flour two 9-inch or three 8-inch baking pans.

In a small bowl sift together the flour, baking powder and salt. Set aside. Pour milk into a measure large enough to hold it, set aside.

In a large mixing bowl, using the high speed on your mixer, mix butter, sugar, eggs, and vanilla until fluffy, about five minutes. Occasionally scrape down the sides of the bowl to thoroughly mix in all the ingredients.

On low speed, alternately mix the flour with the milk (one third of the flour, half the milk, one third flour mixture, remaining milk, and then last third of the flour), mixing well, but taking care not to overmix (you can cause your cake to fall, believe me, I speak from pained experience). Pour into pans.

Now I get all meticulous over this, but I do weigh my pans on a kitchen scale to ensure that there is an equal amount in each. It makes for better, more even baking. If you don't have a scale, use a measuring cup and try to measure out the batter as equally as possible, but don't make yourself crazy. It's just that with equal amounts of batter, chances are greatly improved that all the layers will be done at the same time.

I smooth the batter down with a spatula, and then I smartly slap the bottom of the pans a couple of times to release any air bubbles that might be trapped.

Bake the layers about 30-35 minutes. Right here, I'm going to share something with you that maybe I shouldn't. I'm sure it will cause gasps of dissension and consternation --but I'm going to tell you anyway -- if you can do it without making the cakes fall, rotate the cakes in the oven. My oven tends to be hotter towards the back so that the side of the pan that faces the back is done before the front side. That uneven baking causes my cakes to rise unevenly. So, I usually give the pans a gentle turn, about 20 minutes into baking. However, if your cakes fall, don't say there weren't plenty of others who tried to warn you!
Use a wooden toothpick to test the center, and if the toothpick comes out clean, cake is done.

This frosting is an absolute must for this cake. The two together are a marriage made in heaven and how many of those do you know?

French Silk Frosting

2 - 2/3 cups confectioners' sugar
2/3 cup soft butter
2 ounces melted, unsweetened chocolate (cooled)
3/4 teaspoon vanilla
2 tablespoons milk (or enough to achieve desired spreading consistency)

Sift the confectioners sugar and then combine remaining ingredients, except milk, in a small mixer bowl. Gradually add the milk, beating until smooth and fluffy.

Like Old Roses, I felt that a single recipe of the frosting was inadequate, so I doubled it. If you do decide to double the frosting, use a large mixing bowl. With doubling, I had more than enough, and actually had enough remaining to pipe a simple border, even after spreading a nice thick layer on and over the cake. I still had some left over; the frosting is so good though, I bet it would be wonderful on cupcakes!